Optimise Bubble: Compress User Images Before Upload
We use CropGuide to compress user images before upload on a Bubble site, no technical skills required.
First we need to install CropGuide for Bubble. Then we can set up image compression. This might sound like a lot, but don’t worry, it’ll only take a couple minutes.
Try a live CropGuide demo on our landing page
Set the image compression amount
We can set our intended compression amount in the CropGuide customer dashboard, this will ensure images uploaded by your users will always be compressed before they’re uploaded resulting in shorter upload times.
- Select your website in the Customer dashboard.
- Scroll towards the Configuration heading.
- Then scroll down towards the Image Quality heading.
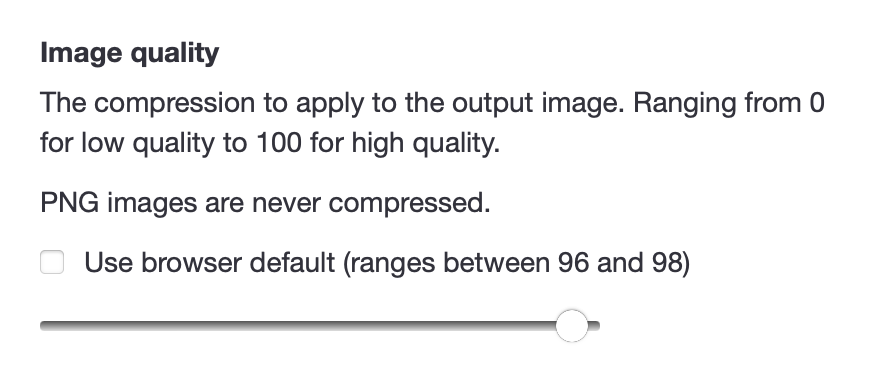
- The higher the value the higher the image quality and the bigger the image size in bytes. We can set it to
70%to get a good compression to image quality ratio. - Click save.
If you want to make sure the images users upload contain enough details, you can optionally set the Minimum Crop Size field. This will prevent users from uploading low resolution images.
Now navigate to the form on your website and refresh the page so we can test if our new settings have loaded.
Test your image upload field
When using the image upload field on your Bubble site, CropGuide will now ensure every image is compressed before upload, resulting in faster uploads, less disk usage, and lower costs for you.
Try a CropGuide demo on the site, or reach out if you have any questions.
Related content
- Add an Image Cropper to your Bubble site
- Crop A Photo To PAN Card Size On Bubble
- Crop A Photo To Cédula Size On Bubble
- Crop A Photo To Identity Card Size On Bubble
- Crop A Photo To Aadhaar Card Size On Bubble
- Crop A Photo To Passport Size On Bubble
- Crop Circle Profile Pictures on Bubble
- Convert HEIC to JPEG on Bubble Before Upload
